In the summer of 2006, I gutted the rear interior of my Mercury Cougar to build a custom car audio system from scratch. The goal was better sound, more cargo room, and a platform I could upgrade over time. Three weeks of Damplifier Pro, MDF, and epoxy later, I had 116 square feet of sound deadening and a custom isobaric bandpass subwoofer box built into the back seat wells.
The Gear
- Second Skin Damplifier Pro (116 sq ft of butyl deadening mat)
- Second Skin Spectrum (2 gal liquid deadener)
- Second Skin Overkill (60 sq ft closed-cell neoprene foam)
- Alpine CD head unit
- 4x Kenwood 50W 6”x8” component speakers (dome tweeters) with foam baffles
- Alpine 4-channel x 40W amplifier
- 2x 10” Pioneer 350W subwoofers
- Rockford Fosgate 2-channel x 90W amplifier
- Custom MDF bandpass subwoofer box
Future upgrades on the wish list: battery relocation, dual Alpine 220W mono amps for the subs, and a touch-screen GPS head unit.
Sound Deadening
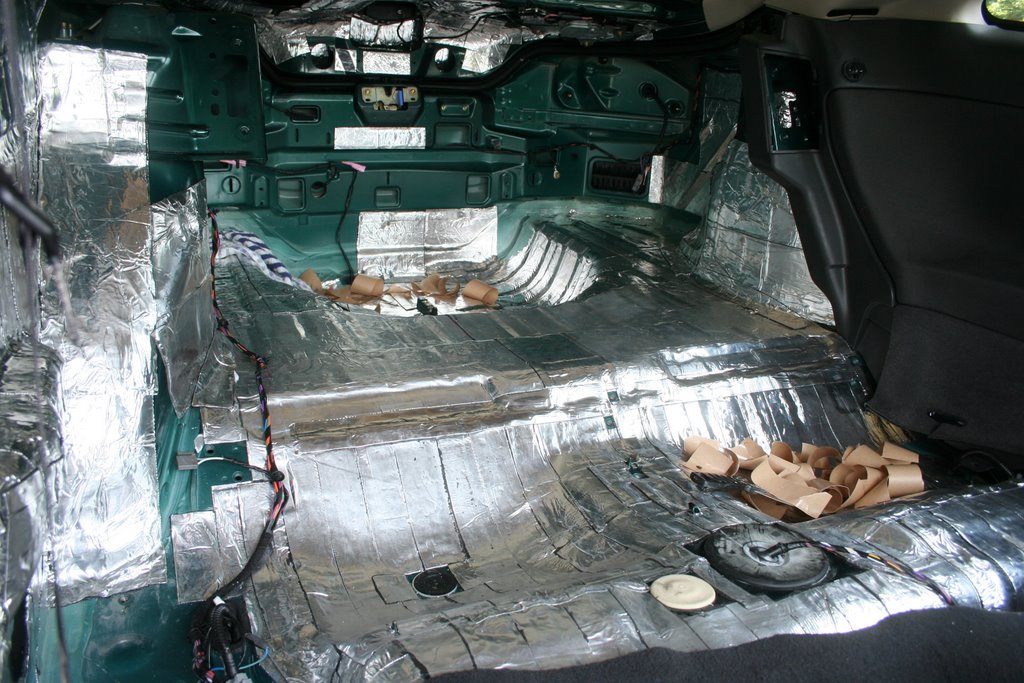
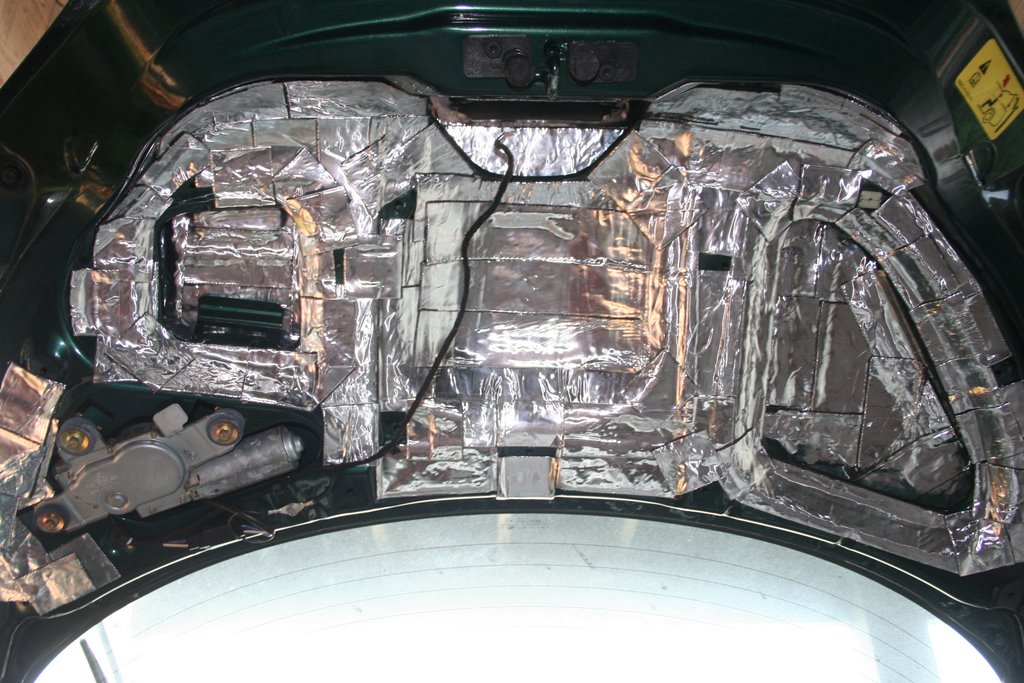
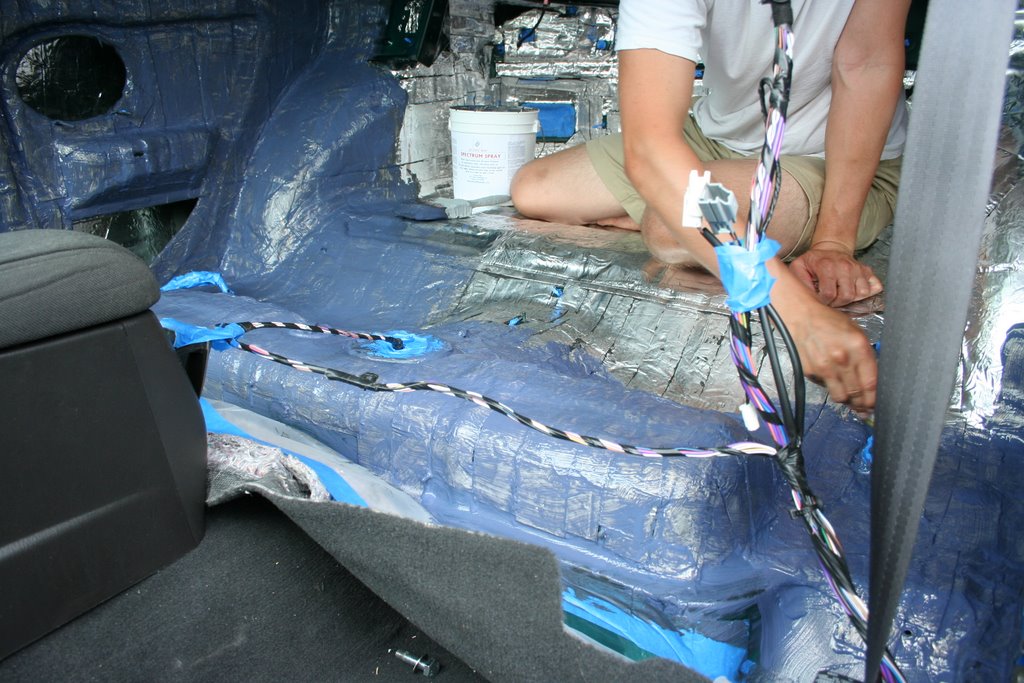
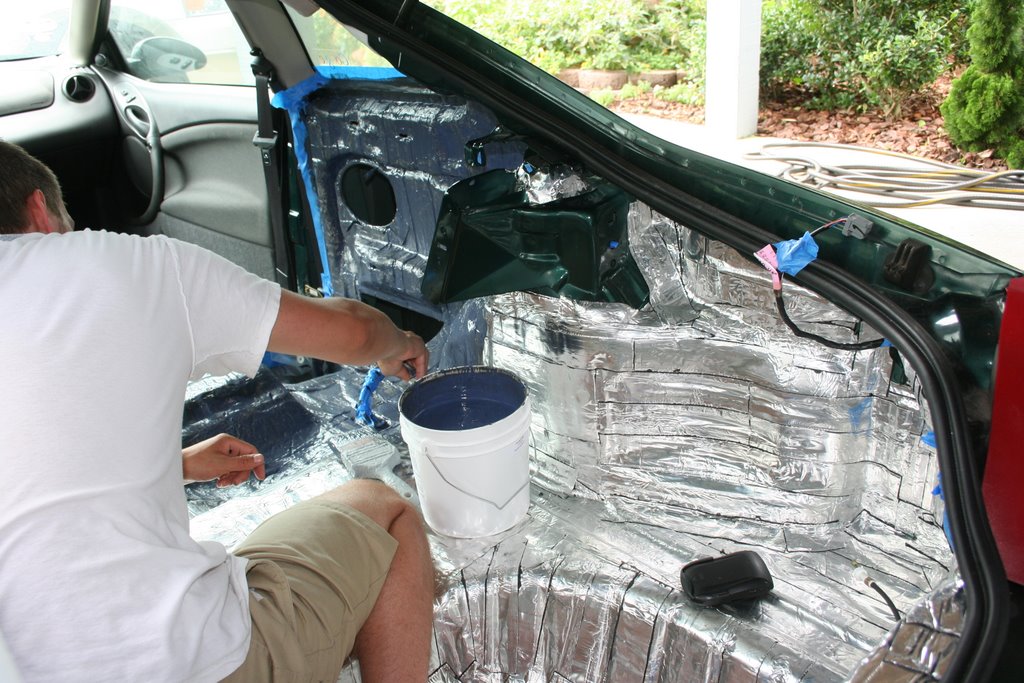
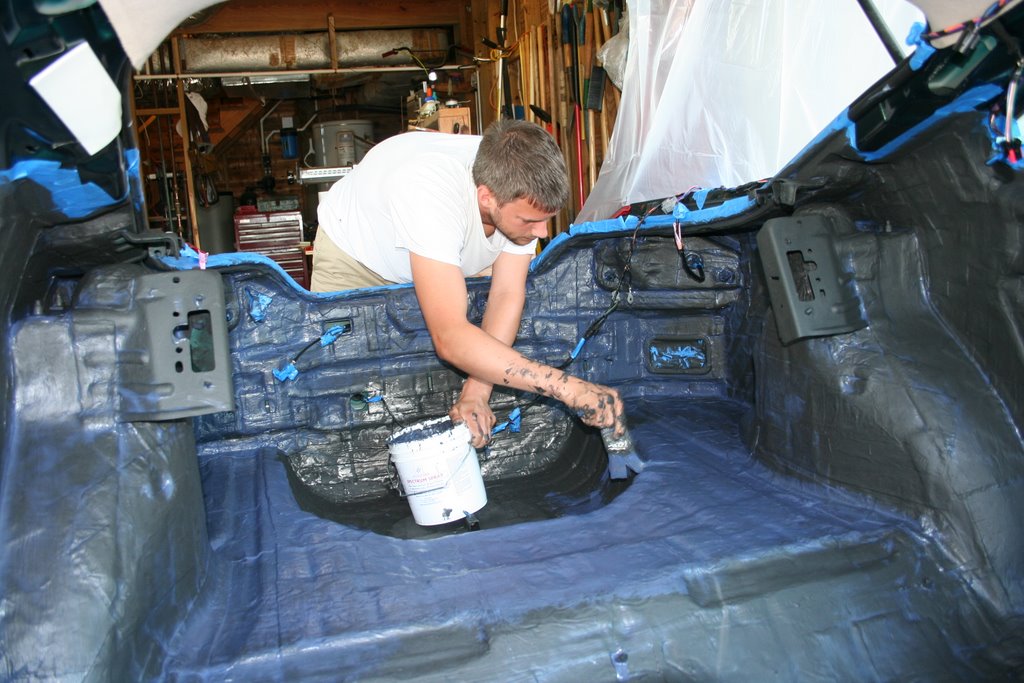
The deadening install was the most labor-intensive part — three rounds of Damplifier Pro, cut into 2” strips for hard spots, applied with a heavy-duty rubber roller. The sticky butyl adhesive was messy (wear old clothes) and had a tendency to squish out between seams.
I stripped the rear interior down to bare metal: back seats out, trunk panels out, everything exposed. The deadening went in layers following the recommended stack from Sound Deadener Showdown:
- Two layers of Damplifier Pro on all surfaces
- Spectrum liquid deadener brushed/rolled on top (gives a clean surface and seals the butyl seams)
- Overkill closed-cell foam on top of that for high-frequency blocking
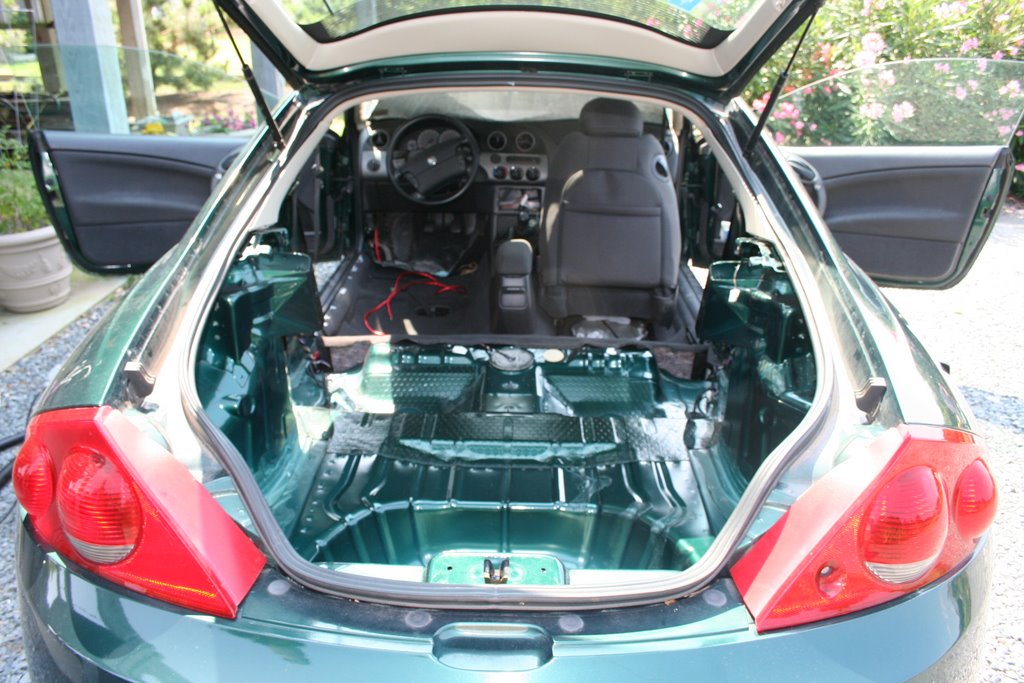
After 116 square feet of mat, two gallons of Spectrum, and 60 square feet of Overkill, the rear half of the car was done. The front doors got deferred — they’re discrete components and easier to do later.
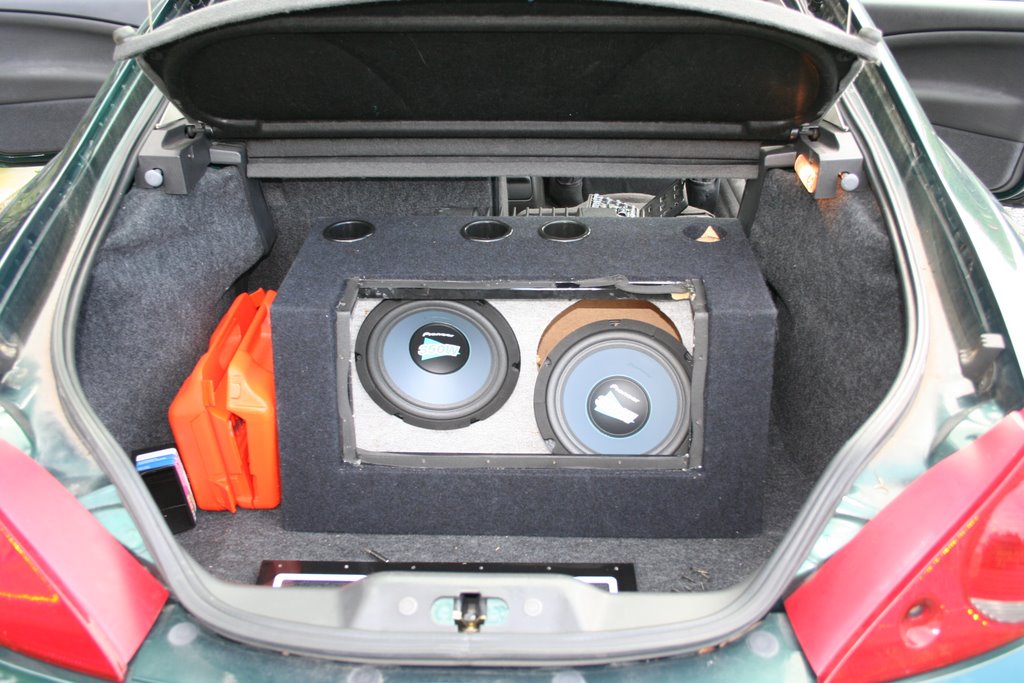
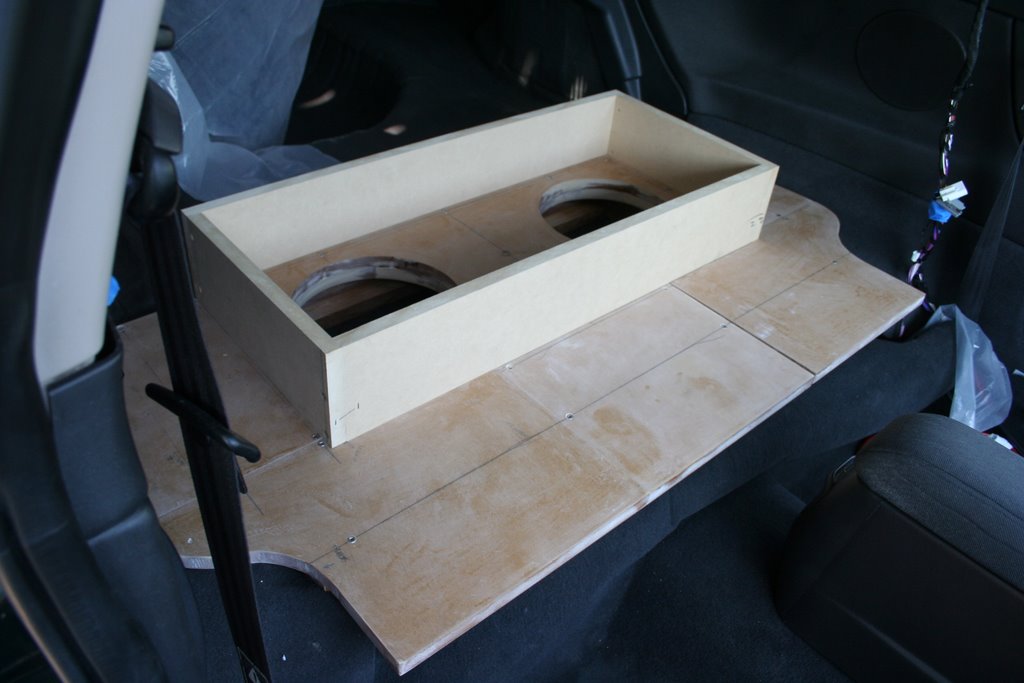
Subwoofer Box Design
The box design went through several iterations, each driven by the constraint of fitting into the back seat wells while hitting the right enclosure volume for the Pioneers.
The first design was a three-chamber bandpass with four slot ports. I ran the Thiele-Small parameters through a spreadsheet — Vas, Fs, Qts — and got the sealed and vented volumes, port lengths, and frequency response curves. The math was straightforward, but the box came out too large for the space.
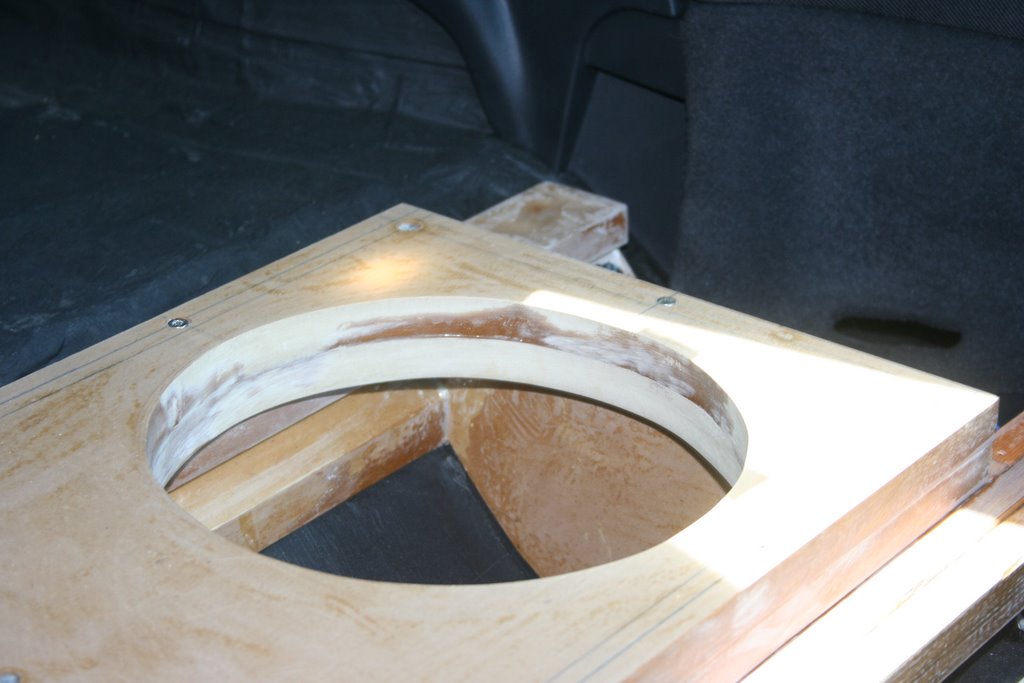
The fix was going isobaric (push-pull): mounting two drivers face-to-face in a shared airspace, which effectively halves the required enclosure volume. This simplified the design to a two-chamber bandpass with two slot ports. The tradeoff is you use twice the drivers for the same output, but the size reduction was worth it for a car install.
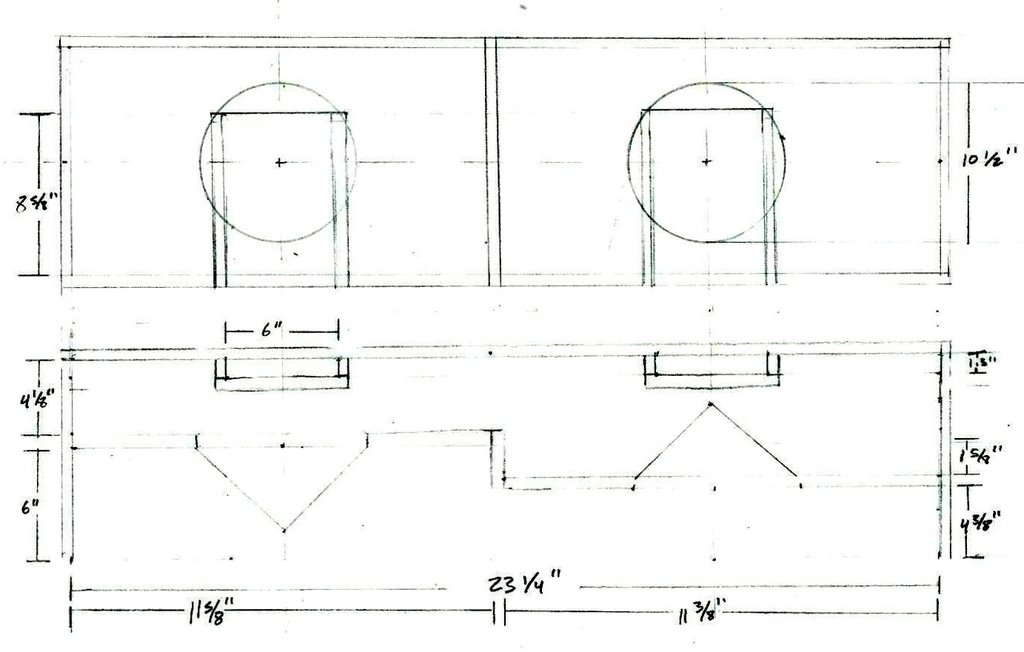
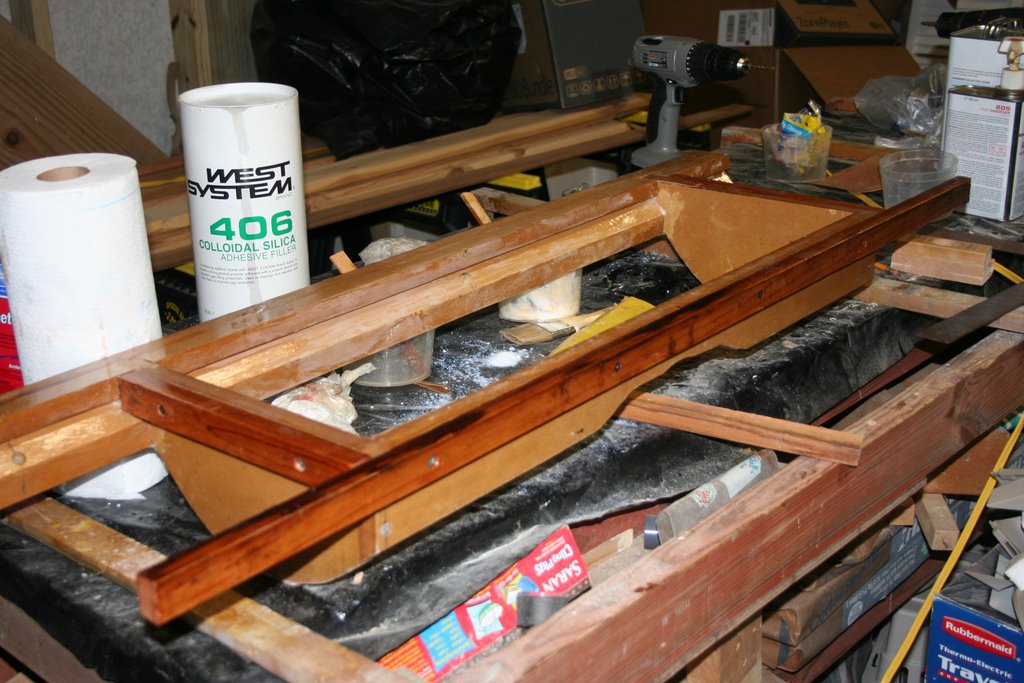
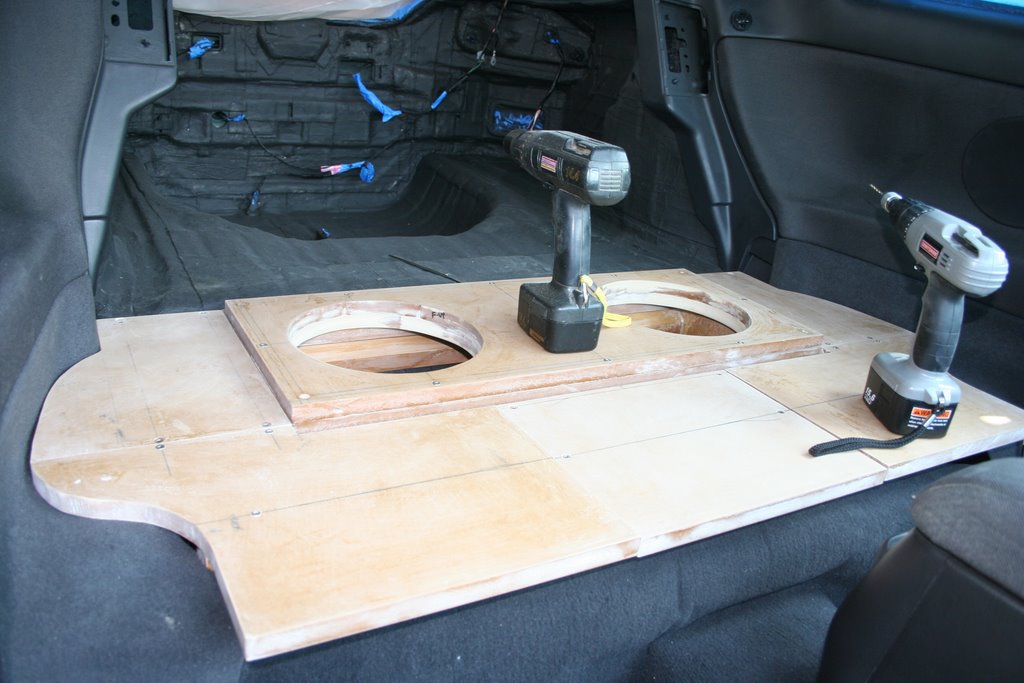
The box was built from 3/4” MDF, coated with epoxy for waterproofing and rigidity, with fiberglass on the seams. The frame tied into the original seatbelt mounting points. The vented top section was designed to be removable so I could experiment with port direction (facing the trunk vs. facing the cabin).
What I Learned
- 2” strips of Damplifier Pro handle complex curves better than trying to cut fancy shapes.
- Don’t cheap out on the roller. The heavy-duty rubber one from Crutchfield was worth every penny.
- Liquid deadener over mat is essential. The Spectrum sealed the butyl seams and gave a clean surface for the foam layer.
- Isobaric designs are the move for tight spaces. Half the volume for the same low-end response — the math is elegant and the real-world result matched.
- Build the box removable. Semi-permanent installation with a few bolted sections means you can actually service it later.
Build Log
Date Progress 2006-06-20 Project started; gear list finalized; first box calculations 2006-06-21 Switched to push-pull design to reduce box volume 2006-06-22 All gear arrived 2006-06-23 Gutting complete; first 2 sheets of Damplifier Pro installed 2006-06-25 Final box design drawn; halfway through deadening 2006-06-29 Ordered 40 more sqft Damplifier + Spectrum + Overkill; box construction started 2006-07-01 116 sqft Damplifier installed; box frame in progress 2006-07-06 All Damplifier Pro installed 2006-07-09 Spectrum applied (2-3 coats); box frame nearly complete